Showing posts with label sephora by opi. Show all posts

Thursday, June 5, 2014

Metallic Fishtails

The fishtail pattern is a really fun and easy way to add extra color into your manicure.


See what colors I used and more pictures after the jump!

Thursday, October 31, 2013

Halloween 2013: Starfire Nail Art

Happy Halloween! I was going to post a Halloween-themed manicure today, but my Macbook's SD card drive has decided not to work and thus the pictures are now trapped in a weird limbo. I'll show that to you as soon as I solve that problem, but in the meantime, I have the nail art I'm wearing to go with my costume for this year! So it's still Halloween themed. Sorta.

Anyway, this year, I'm being Starfire! She's an alien princess superhero from the DC universe. She appears in the comics, but my costume is based on the popular cartoon, Teen Titans (not her comic book counterparts - those costumes show WAY too much skin for me!). I was/am obsessed with that show, and this year, my friend and I decided to dress up as characters from the cartoon. She's being Raven. We made our costumes by hand, which in retrospect was an insane idea. I can hardly sew, but I managed to create Starfire's entire outfit by hand! I haven't had a chance to take a lot of pictures yet (which is why I wanted to post this manicure later), but you can get the gist of the costume from the picture I've included at the end of the post.


Okay, so after that long introduction, here's the nail art! Starfire's powers include shooting bright green starbolts from her hands, so I did a manicure that was mostly a bright green. I also wanted to give a nod to her alien heritage by adding some futuristic detailing.


I started with a base of China Glaze in White on White so the neon would really pop. I layered China Glaze I'm With the Lifeguard over that, which is a great, shimmery neon green. Then I added a coat of China Glaze Fairy Dust for some tiny holographic sparkles. I let all of that dry, and then used a striper brush and Sephora by OPI Queen of Everything to freehand the striped pattern. I added purple rhinestones for a pop of contrast (and to match the purple of her outfit).


I'm pretty pleased with how these came out. They're super bright, and my freehanding skills are definitely improving. Even my right hand doesn't look bad!


Here's my costume! Starfire has really bright green eyes, so I used makeup to show that. I really wanted to use colored contacts, but sadly, my eyesight is absolutely awful so buying a pair of green contacts in my prescription would have been too expensive to justify. But I'm really proud of myself! I think the costume came out really well (especially since this is the first time I've attempted to make any sort of clothing). I also have really long boot covers on my legs, but you can't see those here. But trust me, the whole effect is really great.

I hope you all have a really awesome Halloween!

Tuesday, October 1, 2013

Purple Waterfall Stripes

The Nailasaurus has been doing some super cool things with what she calls waterfall stripes - and I decided to imitate her fabulous idea! Surprisingly, this mani is super easy to do.


I started by painting my nails with a base of Essie Bond With Whomever, a lavender creme. The formula was actually a bit runny for my taste.


After that, I took a striper brush and painted on some random, messy stripes of Essie Sexy Divide, a deep purple shimmer. I let that dry, then I added some stripes of Sephora by OPI in Queen of Everything.


Speaking of Sephora by OPI, I got really sad when I found out that Sephora was discontinuing that whole line in favor of something new, so I bought two back ups of Queen of Everything! It's literally the perfect silver; I am totally not being crazy. It's one of the first polishes I bought, actually - I got it to go with my junior prom dress, haha! Seems like so long ago.


But anyway, that's all it takes to make this gorgeous mani! Just some freehanded, messy stripes :) I'll definitely be doing this design again.

Monday, September 9, 2013

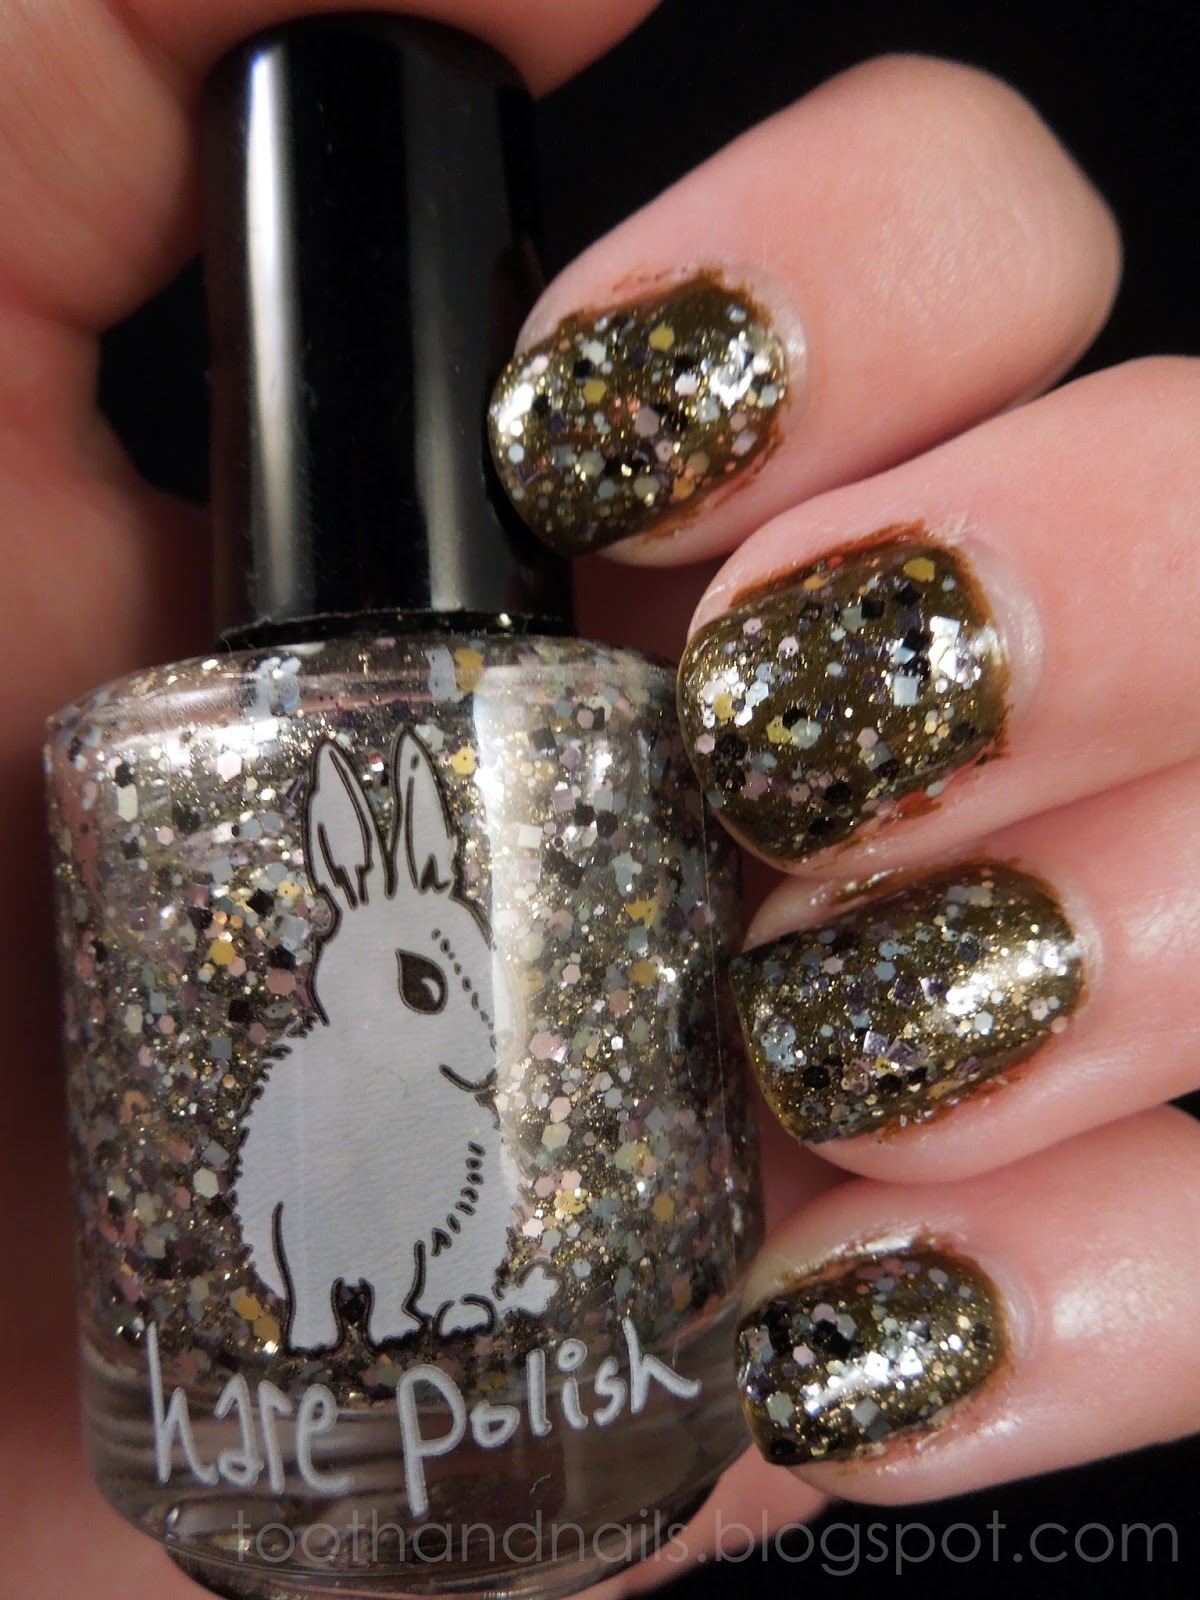
Hare Polish: Own Your Opulence

My undying love for HARE Polish continues: Today I have a polish from The Last Queen of France Collection. It's called Own Your Opulence.


Own Your Opulence is a gorgeous glitter topper. It's a combination of black, gold, gray, and nude glitters with golden shimmer.


I layered just one coat over Sephora by OPI Happy Earth Day to Me, a deep olive green shimmer. As usual, the HARE Polish was loaded with glitter.


HARE Polish is definitely my favorite indie polish brand. I just love everything Nikole creates!

You can purchase HARE from their Etsy shop.

Wednesday, August 14, 2013

Electric Flame + Stamping Swirls

This manicure was a result of indecisiveness - I couldn't decide whether to do a stamping mani or to wear a HARE polish. So I did both.


My thumb, ring, and pinky fingers are sporting a coat of HARE Polish in Electric Flame over a base of Sally Hanses Insta Dri in Snappy Sorbet.


For the accent nails, I started with a base of Sephora by OPI in Here's Lilac-in at You, Kid. Then I used a Bundle Monster Plate and Snappy Sorbet to stamp on the swirly circle design you see here.


 I like the purple and orange color combo! It really pops.

Thursday, June 27, 2013

Throwback Thursday: Duochrome Gradient

Today's Throwback Thursday features one of my favorite nail art techniques: a gradient!


Space Cadet by ORLY is just a great color. Its weird purple-y green duochrome is so interesting! I noticed that Gleek Out by Sephora by OPI is a similar green to the green flash of Space Cadet, so I decided to do a gradient. I used Gleek Out for the base color and sponged Space Cadet on the tips with a makeup sponge. Simple, but pretty.

That's all for today!

Thursday, May 23, 2013

Gold Glitter and Hell to the No

Welcome to another edition of Throwback Thursday! Today I have one of my favorite color combos: purple and gold.


I went for something simple with this manicure. I just added a glitter accent nail to keep it from being too boring. The purple is Sephora by OPI's Hell to the No from their Glee collection. I'm not a big fan of Glee, but when I saw swatches of this polish, I had to have it. It's a purple with a beautiful gold shimmer. I added the accent nail, which is Milani One Coat Glitter in Gold Glitz. One Coat Glitters actually cover very well in one coat, but I used two anyway. Overall, I like the end result!

Tuesday, May 21, 2013

Half and Half: Dots and Glitter

Sorry I've been so sporadic with posting! My semester ended recently and then we took a trip to Dublin, so it's been pretty hectic around here. I'm off to Berlin and Amsterdam for the week too, but I have posts scheduled for that time :)

Anyway, today I have another nail art rut design. I couldn't decide what to do, so I dug around my basket of polish until something jumped out at me.


I started with a base of Sephora by OPI Queen of Everything. Then I freehand painted half of my nails with Deborah Milano 99. I used a dotting tool and 99 to add dots to the silver half of my nails. It still didn't feel complete, so I added a layer of Models Own Freak Out to the blue half of my nails.


I don't usually like shard glitter that much, but Freak Out is such a fun polish.


I got out of this nail art rut pretty quickly, thank goodness :) Check back soon for another Throwback Thursday!

Friday, May 10, 2013

Harry Potter Nail Art: Revisited (Plus Hogwarts Crest Tutorial)

Sorry for the lack of posts lately! I've had a really busy week. On Monday and Tuesday I was in London, then Wednesday was my 21st birthday! Thursday was a bit of a recovery day, haha. But anyway, I'm really excited about the nail art I have to show you today.

On Tuesday, my friends and I went to the Warner Brothers Harry Potter Studio Tour! I am a HUGE Harry Potter fan, so I knew I had to do some nail art for the occasion.


This post is pretty picture heavy, so you can see the rest (and the tutorial) after the jump!

Thursday, April 25, 2013

Throwback Thursday: Neon Tape Decals

Happy Throwback Thursday! Today I have a really cool mani I did a looong time ago. It took a lot of time and patience, but I really like how it came out. It involves tape decals.


Tape decals are created by painting nail polish onto a piece of clear tape, letting it dry, and then cutting the tape into shapes or stripes. Then you just stick them on your nail! You have to add topcoat to seal them on, but honestly it's really pretty easy, just a little time consuming.


For a base color I used my favorite silver, Sephora by OPI in Queen of Everything. I can't remember what colors I used for the decals - a bunch of China Glaze and Sinful Color neons, I believe.

I should try another tape decal mani sometime soon!

Tuesday, January 1, 2013

New Year's Glitter Gradient

Happy New Year! I hope you all had fun on New Year's Eve :)

2012 was a pretty good year for me, but here's hoping that 2013 will be even better. I'll be going abroad next semester, so I think 2013 will be filled with awesome new experiences.

For my New Year's Eve nails, I wanted something sparkly.


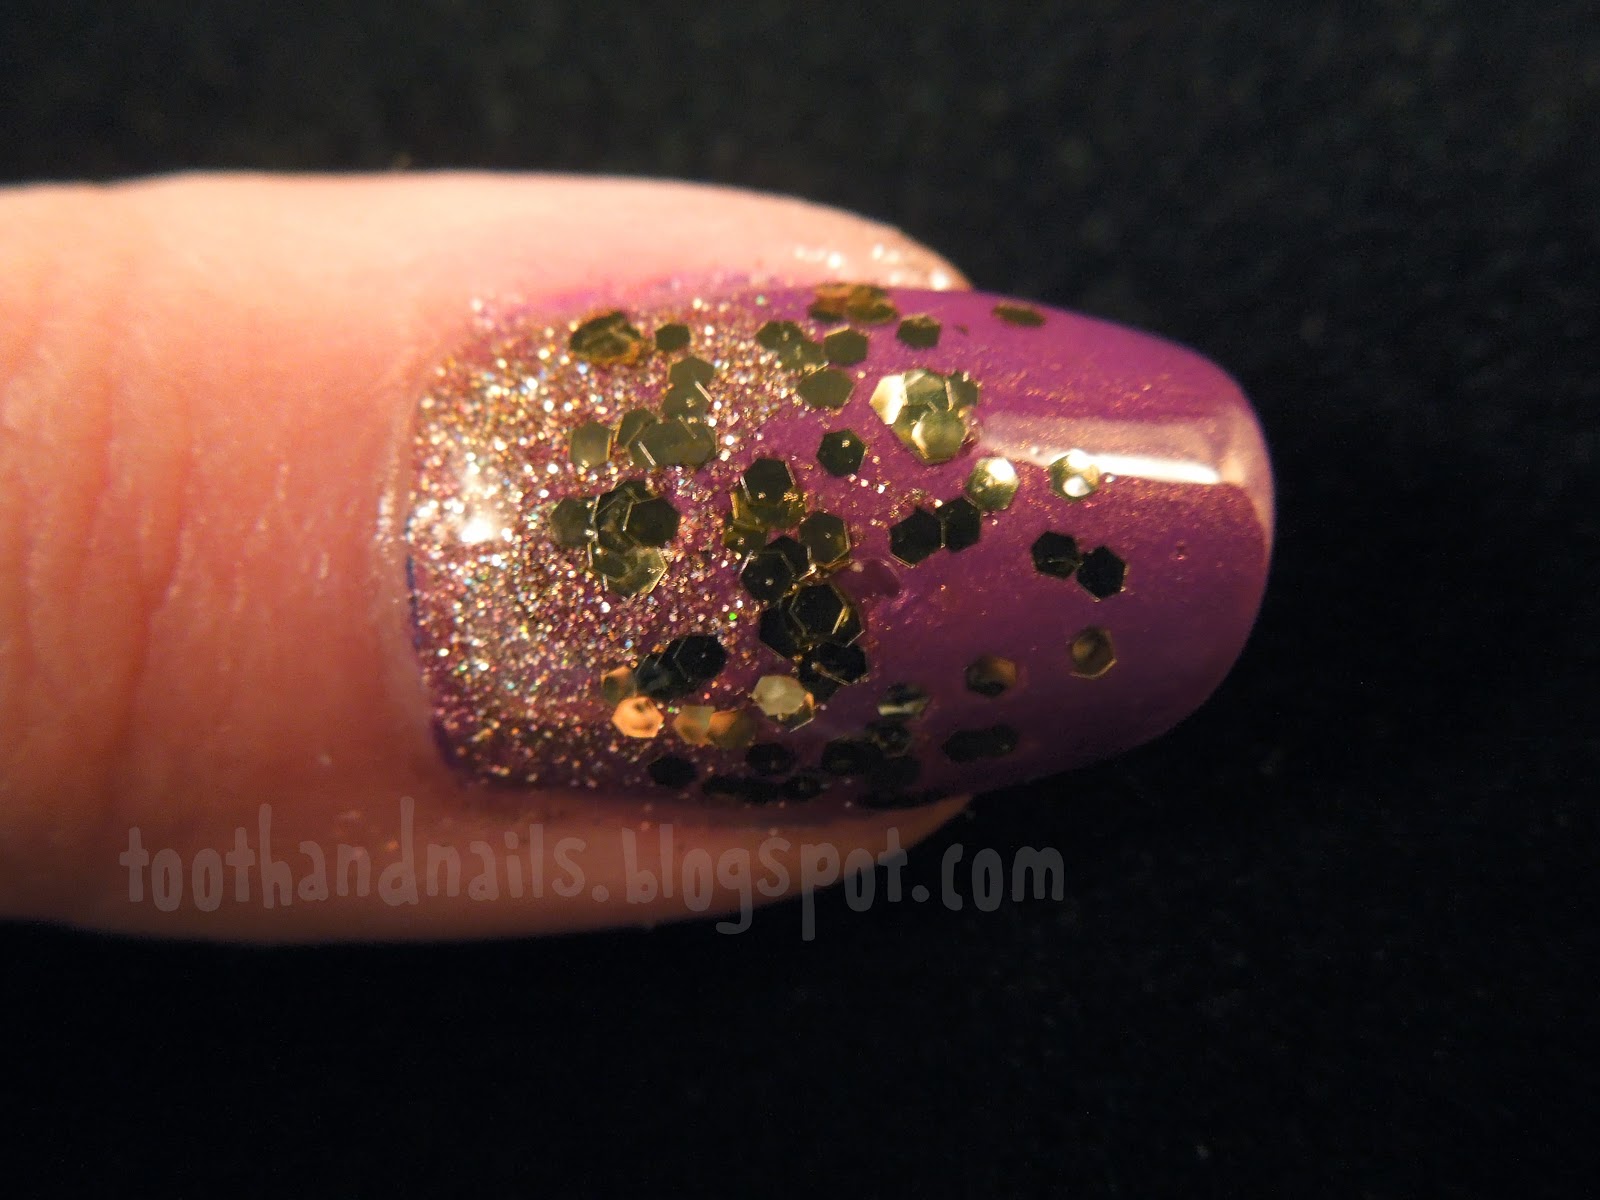
I started with two coats of Sephora by OPI in Hell To The No, a purple with golden shimmer. It's such a lovely color; it's a shame it was limited edition. I thought gold glitter would complement the gold shimmer, so I reached for China Glaze Champagne Kisses, a find gold glitter with holo particles. I painted that on with a nail art brush and used the brush to drag the glitter down my nail. After that, I added Milani Jewel FX in Gold in the center of my nails for some added glitter. I used two coats of Seche Vite to make it all smooth.


I really love all of Milani's glitters. They're so lovely, especially for their price point.


You can really see the shimmer in Hell To The No in that close up!


I love how sparkly these are; they're just what I wanted for New Year's Eve.

I hope 2013 treats you all well!

Tuesday, October 30, 2012

Day 9: Rainbow

Hello, readers. To all of you on the East Coast that have been affected by Hurricane Sandy, my heart truly goes out to you. Since I'm in Pittsburgh for school, we haven't been hit very hard. But my family and loved ones are in New Jersey without power, and they're in a state of emergency. Thankfully, they are all safe. The pictures I've seen of the devastation break my heart. I hope everyone affected is able to recover from this tragedy quickly.

On a brighter note, I have some nail art for Day 9's rainbow theme.


To achieve this look, I started with some glittery polishes, which I've listed below.
Thumb: Milani One Coat Glitter in Red Sparkle
Index finger: Milani One Coat Glitter in Gold Glitz
Middle finger: Milani One Coat Glitter in Purple Gleam
Ring finger: Milani One Coat Glitter in Blue Flash
Pinky: Milani One Coat Glitter in Silver Dazzle


Then I used striping tape to make the designs. I painted over each nail with Sephora by OPI's Never Enough Shoes, a black creme with lots of rainbow sparkle. I topped this mani with a coat of Seche Vite.


I think these are the last pictures from my old camera! But my new camera has come in, so posts will continue regularly.

Please keep those affected by Hurricane Sandy in your thoughts.

Monday, October 22, 2012

Day 8: Metallic

Day 8's theme is metallic! I decided to do a metallic dot gradient.


Oddly enough, all of the polishes I used for this mani are Sephora by OPI. I started with a base of Queen of Everything, which is one of my favorite polishes. I've put a pretty big dent in the bottle, so you can tell I really like it! It covers perfectly in just one coat.


Then I used a large dotting tool to add some dots of Rumba Romance, a metallic brown. I switched to a smaller dotting tool about a third of the way up my nails. I repeated the steps with Tempted by Teal. To seal it up, I used a coat of Seche Vite.


I liked this mani! Queen of Everything is just so lovely and perfect, and polka dots are always fun.

The next day's theme is rainbow!

Tuesday, September 25, 2012

Day 4: Green

The theme of Day 4 is green. I picked up a new green that was on sale at Sephora recently, so I decided to try it out! It's called Designer Fig Leaf, and it's from Sephora by OPI. I actually had my eye on this color for a while, so I was pretty excited to find it on sale.


I decided to do another tape mani. I taped off my nails diagonally and used Zoya Julieanne for the purple half. Julieanne is such a fabulous purple with lots of interesting shimmer. Overall, I liked this mani. And I just love when my lines are so clean!


I was too lazy to set up my lightbox for pictures this time...oops!

The next theme in the challenge is blue. Look for that in a few days :)

Saturday, August 11, 2012

Harry Potter and the Deathly Hallows Nails!

Hello everyone. I'm down the shore for the weekend, but I'm stuck inside due to my injured foot. Thankfully ABC Family is having a Harry Potter weekend! I'm a huge fan of the series, and today I have some Harry Potter nail art for you. I'm still testing the wear of Mr. Bubble, and it still hasn't chipped (which is extraordinary; most polishes chip after 2 days on me). 

I did this manicure over a year ago for the premiere of Harry Potter and the Deathly Hallows: Part Two (has it really been that long since the release already?!). I dressed up as a student of my house, Ravenclaw, and went to the midnight release with my best friends. We were first in line! I decided that some Harry Potter themed nails were necessary for the occasion. I did a nail for each house: Gryffindor on my index fingers, Ravenclaw on my middle fingers, Slytherin on my ring fingers, and Hufflepuff on my pinkies. I painted the lighter base color on each nail first, then used squares of tape to make the checked design with the darker color. On my left thumb, I painted the HP logo, and I painted the Deathly Hallows mark on my right thumb. They're a bit messy; bear in mind that this was over a year ago, relatively early in my foray into more complicated nail art. Nevertheless, I liked how they came out!

Right Hand
Left Hand

I used a ton of colors in these, but here's a list:

White: Sally Hansen Xtreme Wear in White On
Red: Brucci Nail Hardener in Therese is Red Hot
Gold: OPI in Curry Up Don't Be Late
Bronze: Sephora by OPI in Rumba Romance
Blue: OPI in Yoga-ta Get This Blue
Silver: Sephora by OPI in Queen of Everything
Yellow: Sally Hansen HD in Lite
Black: Sally Hansen Xtreme Wear in Black Out

And that's all of them! I'd like to do Harry Potter nails again someday. I got a lot of comments on these.

Sunday, August 5, 2012

Rainbow Polka Dots

I still haven't gotten around to painting my nails :( Maybe later on today I'll hobble into my room and give it a shot. So again, I have a picture from the vault. I think this manicure came out great. It's really fun and really easy!


All you need is a dotting tool and some patience :)


I used a ton of colors in this. I started out with a base of Sally Hansen Xtreme Wear in Black Out. The polka dots are the following shades:

Orange: Sun Kissed by Sally Hansen Xtreme Wear
Blue: The Real Teal by Sally Hansen Xtreme Wear
Pink: Flirty by ORLY
Purple: Frolic by ORLY
Green: Fresh by ORLY
Yellow: IM Beauty by Sephora by OPI

And that's all I have for you today. Happy Sunday!