Showing posts with label opi. Show all posts

Thursday, July 17, 2014

Penguins and Stripes (Plus Tutorial)

There is never a wrong time for cute animals. And even though it's summer, it's a perfect time to sport some wintery penguins on your nails!


I've included a tutorial for the penguin nail art after the jump, so read on!

Monday, June 16, 2014

Autumn Trees

Summer's just about to be in full swing, but I'm always ready for the fall! I'm not a fan of hot weather (unless I'm on the beach, that is) so I have some autumnal nails to distract from the heat.


See what colors I used after the jump!

Thursday, June 5, 2014

Metallic Fishtails

The fishtail pattern is a really fun and easy way to add extra color into your manicure.


See what colors I used and more pictures after the jump!

Monday, April 28, 2014

Blue and Olive Dotted French

French manicures were really popular in my area when I was growing up. I always thought they were a little boring, but I can definitely get behind more interesting variations on a plain French manicure. This one uses dots instead of the usual straight line.


Read more after the jump!

Wednesday, March 26, 2014

Contrast Multi Dots

My friends always make fun of me when I say "dotting tool," but let me tell you -- those things are the best. Today's manicure features some polka dots.


I've decided I'm going to try doing "read more" posts to reduce loading time for the home page. So read more and see more pictures after the jump!


Tuesday, December 3, 2013

Minty Stripes and Dots

Sorry it's been a while! I've been so busy with school and the holidays I forgot to post. I can't believe it's December already -- where does the time go?

Anyway, today I have some cute nail art for you. I don't really know what to call it though. Stripes and dots?


I started with a base of China Glaze Highlight of My Summer, a bright mint green. I used a striper brush and OPI Alpine Snow to freehand the crisscrossing stripes. Then I used a dotting tool to add pink dots with Essie The Girls Are Out. Pretty simple!


I think it's really cute! I like the color contrast.


Hope you all had a great Thanksgiving!

Sunday, October 13, 2013

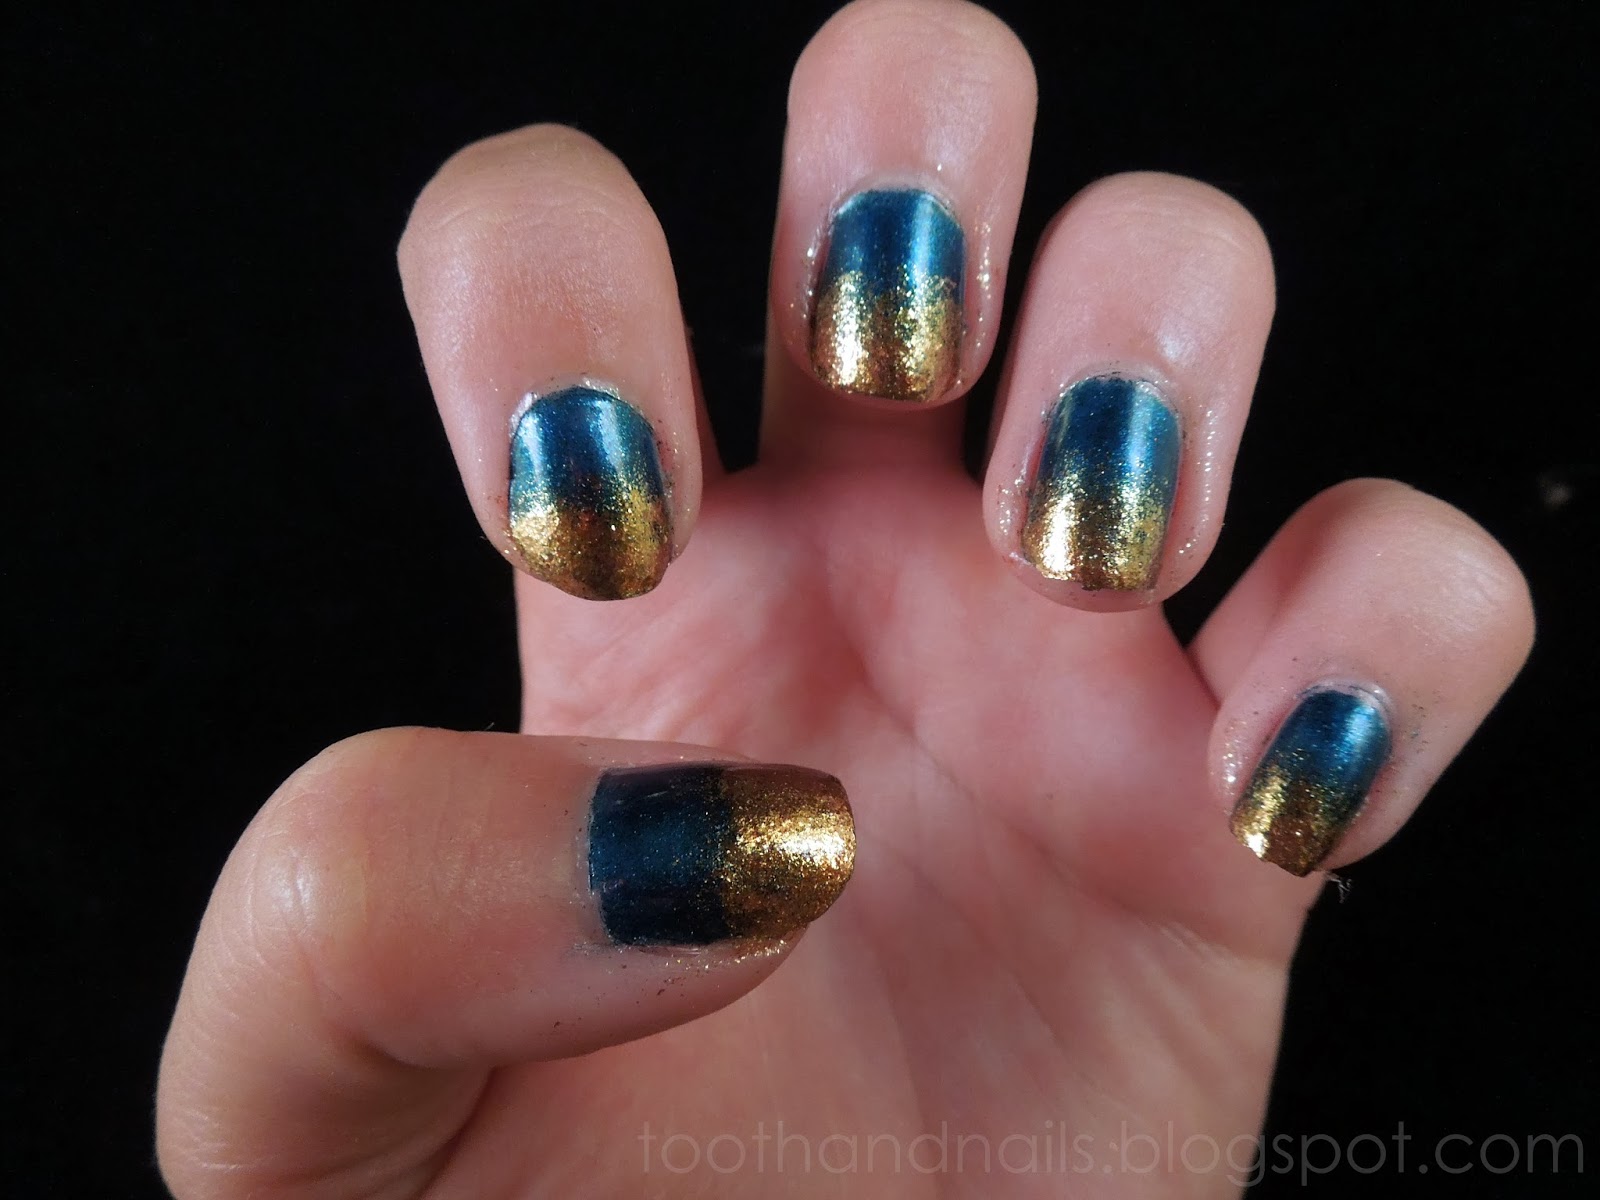
Blue Gold Gradient

Gradients are my go-to nail art when I feel like I'm in a rut. This time, I went for the classic color combo of blue and gold.


I started with a base of Bluey by Butter London, a shimmering deep blue. I let that dry, then used a makeup sponge and Goldeneye by OPI to create the gold gradient.


I can't say enough good things about Goldeneye - it's definitely becoming one of my favorite polishes!

Saturday, June 22, 2013

Nautical Skittles + Anchor Tutorial

I've been such a bad blogger lately! Sorry about that - I've been really busy with friends and my internship. I have a tutorial to make up for it :)


Nautical skittles! I really wanted to try out vertical lines, and it made me think of a nautical theme so I did an anchor accent as well. Here's the tutorial for how to freehand an anchor:


It's pretty straightforward, really.


For my thumb and middle finger, I used a base of China Glaze Sea Spray then topped it with two coats of Candeo Colors Divebomb. For my index finger and pink, I started with a base of OPI Goldeneye. I let that dry completely, then I used striping tape and China Glaze First Mate to create the vertical stripes.


For the anchor nail, I started with a base of China Glaze Turned Up Turquoise and used a makeup sponge to add a gradient of Goldeneye. I freehanded the anchor using First Mate and a striping brush. All of my nails are sealed with Seche Vite for smoothness and shininess :)


I really love how these turned out! Vertical stripes really appeal to me, and I think my accent nail is especially cute.

Thursday, May 30, 2013

Snow Globe Skittles

Welcome to another Throwback Thursday! These nails are a little messy, but that just shows how far I've come since then. But I love how the glitter looks here anyway.


Starting with my thumb, the green is OPI in Gargantuan Green Grape, glue is Essie is Coat Azure, Purple is ORLY in Frolic, yellow is Sally Hansen Xtreme Wear in Mellow Yellow, and lilac is Essie in Lapiz of Luxury. They're all topped with a coat of China Glaze Snow Globe.

Thanks for reading :)

Saturday, May 25, 2013

Red, Black, and Gold Skittles

Sometimes I just don't know what I want to do with my nails, so I do something different on each one. I think it's a pretty good compromise :)


I was really feeling the combination of red, black, and gold, so I picked a bunch of polishes that fit the color scheme.


On my thumb, I started with a base of Deborah Milano 103, a pretty red with gold shimmer that I picked up in Italy. Then I sponged on a gradient of OPI Goldeneye, a polish I've been reaching for a lot lately. On my index finger, I used two coats of Barry M Gold Mine Glitter. On my middle finger, I started with a base of China Glaze Hey Sailor, then freehand a triangle of Goldeneye, then another of China Glaze Liquid Leather. On my ring finger, I layered HARE Polish Holiday Hoopla over Liquid Leather. Finally, I used three coats of Goldeneye on my pinky. Phew!


I really like how the colors work together.


Skittles are a really fun way to do your nails when you can't decide on one design. And they look so unique, too :)

Monday, May 13, 2013

HARE Holiday Hoopla + Gold Accent

As you all know, I love HARE Polish. Since I'm in England, I decided to only bring versatile colors with me, and thus only one HARE Polish came across the pond with me. Holiday Hoopla is the only glitter topper from HARE that I had at the time, so I had to bring it with me! And I keep reaching for it.


I've been wearing a lot of red and gold on my nails lately. I thought Holiday Hoopla would look good over an off white, so that's what I decided to do. I used 3 coats of Illamasqua Load then topped it with just one coat of Holiday Hoopla.


Yum, glitter.


I also added an accent nail of OPI Goldeneye. I've been reaching for that a lot, too! It's such a lovely gold.


This manicure was simple, but I like it. HARE never disappoints!

Thursday, April 18, 2013

Throwback Thursday: Blue and Silver

Welcome to another Throwback Thursday! Today, I have a mani featuring a really lovely blue polish: China Glaze Frostbite. I started with two coats of that, then used a makeup sponge to add a gradient of Happy Anniversary! by OPI.


I think my gradient skills have improved since this mani, don't you?

Friday, February 22, 2013

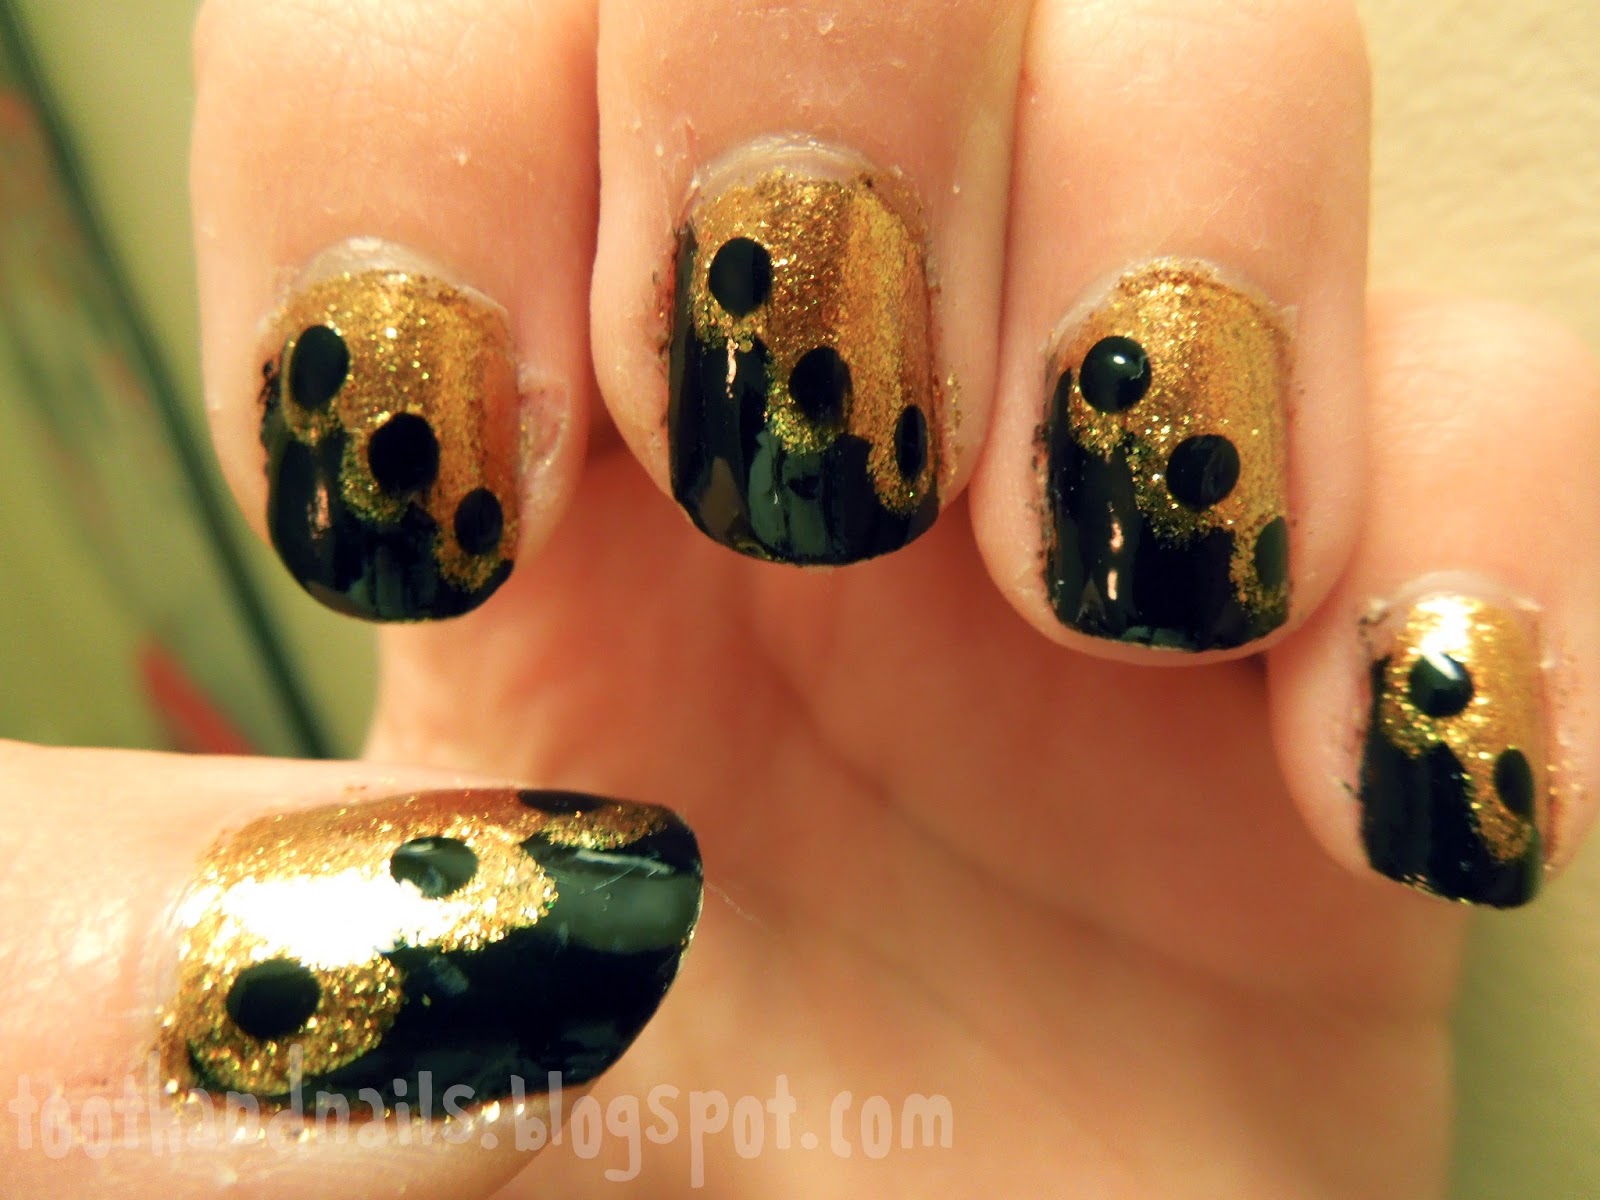
Black and Gold Ruffles and Dots

Today's nail art is actually the first manicure I did while in England! I obviously couldn't bring my light box here, but I did the best I can with photos.


It's so sad not having my full polish collection with me! I had a really tough time choosing what polishes to bring with me, as well. Anyway, I started with three coats of Goldeneye by OPI. Then I painted half of my nails (diagonally) with Liquid Leather by China Glaze. I used a big dotting tool and Goldeneye to go over some of the black, then I used a smaller dotting tool and Liquid Leather to make the black dots. It sounds more complicated than it is, I think!


I wore these nails for orientation :)


My nails look so sad and small :( I always wind up breaking a bunch of nails when I travel! Sigh. Oh well, stay tuned to see how I'll make do with only a fraction of my polish ;)

Saturday, January 19, 2013

HARE Golden Years + Scale Nails

I have another HARE polish for you today! This one is called Golden Years.


I layered two coats of Golden Years over one coat of Yoga-ta Get This Blue by OPI. I didn't want a single colored mani, so I decided to add some accent nails on my index and middle fingers. I again started with a base of Yoga-ta Get This Blue, but I forwent Golden Years in favor of a scale pattern.


But first, let's talk about Golden Years. It's a mix of blue, turquoise, gold, and greenish glitters suspended in a dark blue base. The glitter was a bit less dense than I usually expect for HARE, but it was still quite dense. Application was effortless.


For the accent nails, I used a dotting tool to create the scaly look. I also used the following polishes:
China Glaze Glittering Garland
China Glaze Exotic Encounters
OPI Curry Up Don't Be Late
Sinful Colors Innocent


As usual, I love this HARE polish. And I think the accent nails are cool too :) HARE Polish can be purchased from her Etsy store or from Llarowe.

Monday, November 5, 2012

Hare Polish: Heat Plague

Sorry I haven't posted in a while...I've been really preoccupied over Hurricane Sandy. I can't stop looking at pictures. My family just got power back on Friday, but half of my hometown is still without power. And really, we're the lucky ones - so many people along the Jersey shore have lost everything. It's been a very emotional week for me.

Anyway, I have another fabulous polish by Hare today. These were taken on my friend's iPhone during my week of being camera-less, so sorry for any quality issues!


I didn't take a macro of this since I only had an iPhone. Heat Plague is tons of purple, pink, and orange glitter in a sheer, dark green base.


I layered just one coat of Heat Plague over two coats of Don't Mess With OPI by OPI. Heat Plague has so much glitter! The formula's great too - easy to work with, and the glitter spreads evenly.


Hare continues to impress me with their awesome polishes. They're available through their Etsy store and Llarowe.

Saturday, August 11, 2012

Harry Potter and the Deathly Hallows Nails!

Hello everyone. I'm down the shore for the weekend, but I'm stuck inside due to my injured foot. Thankfully ABC Family is having a Harry Potter weekend! I'm a huge fan of the series, and today I have some Harry Potter nail art for you. I'm still testing the wear of Mr. Bubble, and it still hasn't chipped (which is extraordinary; most polishes chip after 2 days on me). 

I did this manicure over a year ago for the premiere of Harry Potter and the Deathly Hallows: Part Two (has it really been that long since the release already?!). I dressed up as a student of my house, Ravenclaw, and went to the midnight release with my best friends. We were first in line! I decided that some Harry Potter themed nails were necessary for the occasion. I did a nail for each house: Gryffindor on my index fingers, Ravenclaw on my middle fingers, Slytherin on my ring fingers, and Hufflepuff on my pinkies. I painted the lighter base color on each nail first, then used squares of tape to make the checked design with the darker color. On my left thumb, I painted the HP logo, and I painted the Deathly Hallows mark on my right thumb. They're a bit messy; bear in mind that this was over a year ago, relatively early in my foray into more complicated nail art. Nevertheless, I liked how they came out!

Right Hand
Left Hand

I used a ton of colors in these, but here's a list:

White: Sally Hansen Xtreme Wear in White On
Red: Brucci Nail Hardener in Therese is Red Hot
Gold: OPI in Curry Up Don't Be Late
Bronze: Sephora by OPI in Rumba Romance
Blue: OPI in Yoga-ta Get This Blue
Silver: Sephora by OPI in Queen of Everything
Yellow: Sally Hansen HD in Lite
Black: Sally Hansen Xtreme Wear in Black Out

And that's all of them! I'd like to do Harry Potter nails again someday. I got a lot of comments on these.