Showing posts with label purple. Show all posts

Thursday, April 17, 2014

Pastel Stripes and Flowers

Guys, guess what: My senior thesis is finished! Now I have more time for everything (including finding a job and blogging).

Despite that weird snowstorm on Tuesday (thanks, Pittsburgh), it's spring! To celebrate, here are some pretty springtime nails. Read more after the jump!


Tuesday, February 25, 2014

Deranged Split

Sometimes, I want to try out a new polish color, but I don't want to do just a plain manicure. Doing a split manicure is a great way to reconcile that.


Sephora has been going through the process of revamping their polish line, and I picked up this one last winter before they actually discontinued their Sephora by OPI line in favor of the new Sephora X polishes. I think the bottles actually look different now. It's called Deranged, and it's a purple duochrome sort of color that flashes olive gold.


I paired it with China Glaze Exotic Encounters, which I actually used as the base here. I painted that, let it dry, then used tape and Deranged to make the diagonal split.


I think Deranged is a cool polish, and I'd like to try out more of the Sephora X polishes, although they're a little expensive for my tastes.

Tuesday, February 18, 2014

Purple and Peach Leopard Print

I've been a bad, bad blogger.

This semester has been pretty rough -- I've been so focused on my thesis, submitting to literary magazines, and applying to jobs that I've neglected my blog! And for that, I offer my sincerest apologies. I'm gonna try to get back into the swing of things, I promise.

To make up for my absence, have some really cool nail art!


This was my first attempt at a leopard print, and I will definitely be doing it again. It's so much easier than it looks! All you need are 3 colors and a dotting tool.


I used China Glaze Sun of a Peach for my base color. Then I used a large dotting tool to add spots of purple (China Glaze That's Shore Bright) randomly on all of my nails. Next, take a smaller dotting tool and black (China Glaze Liquid Leather) and add some dots around the purple dots. Add topcoat, and you're done! So easy and SO AWESOME.


I really can't believe I've never done leopard print before. I was always intimidated by it for some reason. But now I'm gonna try it in a ton of color combos.


That's all I've got today, but check back soon and keep me on my toes!

Wednesday, January 8, 2014

Lime Crime Splits and Studs

So sorry I haven't posted in so long! Finals came along and I got really busy, but I'm back :) I'll try to stick to more regular posting again.

Today I have some fun nail art featuring the Lime Crime polishes again.


To do this mani, I started by painting all of my nails in the lighter of the two colors I would use. So for my thumb, I painted it entirely yellow, my pointer blue, etc. I let all of that dry.


I was lazy (oops) so I didn't use tape for this mani. I painted another Lime Crime color over half of each nail. Then I used some silver square studs from the Born Pretty store and put them in the center of each nail. Added some top coat, then we're done!


The colors I used were all Lime Crime:
Orange: Peaches <3 Cream
Yellow: Crema de Limon
Green: Pastelchio
Blue: Once in a Blue Mousse
Purple: Lavendairy


I really, really love the Lime Crime polishes!

Tuesday, October 1, 2013

Purple Waterfall Stripes

The Nailasaurus has been doing some super cool things with what she calls waterfall stripes - and I decided to imitate her fabulous idea! Surprisingly, this mani is super easy to do.


I started by painting my nails with a base of Essie Bond With Whomever, a lavender creme. The formula was actually a bit runny for my taste.


After that, I took a striper brush and painted on some random, messy stripes of Essie Sexy Divide, a deep purple shimmer. I let that dry, then I added some stripes of Sephora by OPI in Queen of Everything.


Speaking of Sephora by OPI, I got really sad when I found out that Sephora was discontinuing that whole line in favor of something new, so I bought two back ups of Queen of Everything! It's literally the perfect silver; I am totally not being crazy. It's one of the first polishes I bought, actually - I got it to go with my junior prom dress, haha! Seems like so long ago.


But anyway, that's all it takes to make this gorgeous mani! Just some freehanded, messy stripes :) I'll definitely be doing this design again.

Sunday, September 15, 2013

Purple Layers

I recently picked up a few new Essie colors, and I wanted to try them out. So I combined some colors into this!


I started with a base of Essie Mochacino, a shimmery taupe. I freehanded some purple ovally shapes with Sexy Divide, a deep purple. I let that dry, than added another ovally shape in that one using Bond With Whomever, a lavender creme.


It was easy enough to do. I'm not sure if I'm sold on the color combo, but oh well. I think if I do this again, I'd use four colors instead of three.


Oh well, not every nail art design is a hit! Sometimes, they're just okay.

Wednesday, August 14, 2013

Electric Flame + Stamping Swirls

This manicure was a result of indecisiveness - I couldn't decide whether to do a stamping mani or to wear a HARE polish. So I did both.


My thumb, ring, and pinky fingers are sporting a coat of HARE Polish in Electric Flame over a base of Sally Hanses Insta Dri in Snappy Sorbet.


For the accent nails, I started with a base of Sephora by OPI in Here's Lilac-in at You, Kid. Then I used a Bundle Monster Plate and Snappy Sorbet to stamp on the swirly circle design you see here.


 I like the purple and orange color combo! It really pops.

Wednesday, August 7, 2013

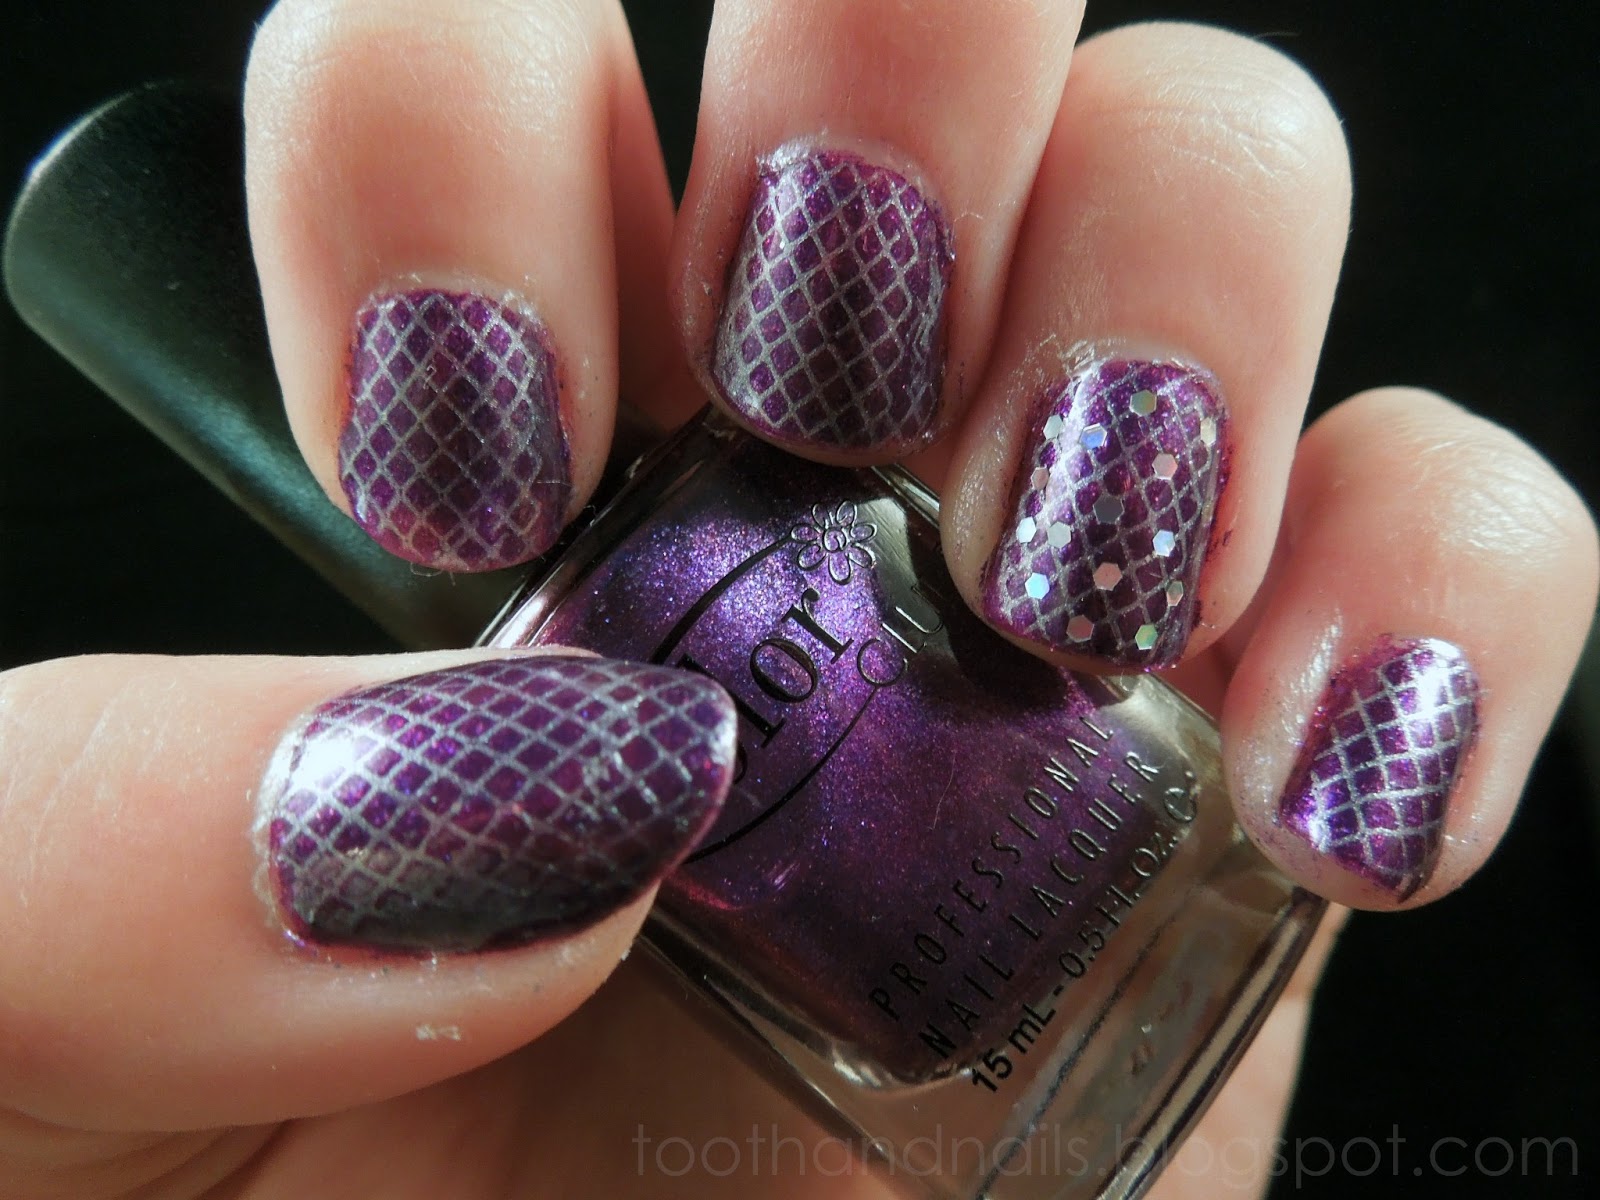
Silver Fishnet Stamping and Glequins

Stamping is not one of my strongest nail art skills, so I try to practice when I have the time (and patience). But sometimes I think that just a plain stamped mani needs a little extra something, and that's how today's nail were born!


I started with two coats of Glitter Wonderland by Color Club, a sparkly purple. Then I used Konad Special Polish in Silver to stamp a fishnet design onto each nail. I wanted a little extra oomph, so I added some silver holographic glequins to my ring fingers. For those of you who don't know, a glequin is a glitter-sequin type thing, and I got mine from the Born Pretty Store.


I think the glequins give this mani the extra sparkle it needed!

Monday, July 29, 2013

Color Club Eternal Beauty

Before spending the semester in England, I had heard about how gray and rainy it is there. But having spent many months in Pittsburgh, I thought I'd be fine! I was wrong. Let me tell you, you really gotta go to England to truly appreciate the sun. So when I came home, the first polish I wore was something that celebrated the sunshine.


A holographic polish! This is two easy coats of Color Club Eternal Beauty, a purple holographic. If you don't have any colors from their Halo Hues collection, you need to go out and get some RIGHT NOW.


It's less impressive in the shade, but still pretty. And indoors, you can still kinda see the holo.


I love holographic polishes, don't you?

Thursday, July 18, 2013

Gray and Purple Marble

I'm a pretty big fan of the plastic wrap marble. It's quick and easy nail art for when you don't have time for something more complex.


For this manicure, I started with a base of China Glaze Recycle, a light gray cream. I let that dry completely, then I added a thick coat of China Glaze Purple Panic. I used a piece of crumpled plastic wrap and pressed it against the wet polish to remove some, leaving a marble pattern. Make sure to do this one nail at a time since you don't want the top polish to dry!


I like the contrast of the gray against the neon, don't you?

Thursday, June 27, 2013

Throwback Thursday: Duochrome Gradient

Today's Throwback Thursday features one of my favorite nail art techniques: a gradient!


Space Cadet by ORLY is just a great color. Its weird purple-y green duochrome is so interesting! I noticed that Gleek Out by Sephora by OPI is a similar green to the green flash of Space Cadet, so I decided to do a gradient. I used Gleek Out for the base color and sponged Space Cadet on the tips with a makeup sponge. Simple, but pretty.

That's all for today!

Sunday, June 16, 2013

(Belated) 21st Birthday Nails

Okay, so I know my 21st birthday was over a month ago, but I just got around to posting these now. Oops!


I didn't have that much time to do my nails, so I wanted something quick but also festive. I started with a polish that is gorgeous on its own, Octopus's Garden by Enchanted Polish. I layered one coat of that over a base of China Glaze Liquid Leather.


Nothing says birthday like multicolored glitter, so that was the next step - I added a gradient of Lynnderella's New Year's Eve Eve to the tips of my nails, leaving my index and middle fingers bare. Then I used a striping brush and China Glaze Glistening Snow to add the 2 and 1 to each finger.


Just look at that duochrome!


And Lynnderella's gliterbombs always make me drool. There are just so many different glitters in there. I'm so glad I was able to snag a bottle of this. Definitely my favorite multi glitter.


You can see the duochrome here. It's hard to capture on camera, but it shifts from purple to reddish to copper to blue.


My 21st birthday was pretty crazy, but it was fun!

Thursday, June 6, 2013

Throwback Thursday: Blurple Glitter Gradient

Hello everyone! It's good to be back on Eastern Standard Time. Today, I have another Throwback Thursday for you.


I used a base of Galaxy Girl by ORLY, then I used a makeup sponge to add a gradient of Blue Flash by Milani One Coat Glitter.

Thanks for reading!

Saturday, June 1, 2013

Saran Wrap Contrast

I've only tried the saran wrap (or plastic wrap, whatever you call it) technique once before, but I remember thinking it was really cool! So I decided to give it another go.


I wanted to use two colors that would really pop against each other, so I chose a bright neon and a dark creme. I started with a base of China Glaze White on White then layered two coats of ORLY Melt Your Popsicle over that. I let that dry completely.


When that was dry, I layered a coat of Barry M Indigo over one nail at a time, pressing a piece of crumpled plastic wrap against the coat of Indigo to remove some of the polish. And voila! Instant nail art.


I added some rhinestones from the Born Pretty store for extra detail.


I'm surprised at how dark Indigo wound up looking - it looks purpler in the bottle. But oh well, the effect is still cool.


It looks like fire! Thanks for reading :)